• What is the CD-i?
    • CD-i Players
    • CD-i Accessories
  • Open Source
    • Hardware Development
    • Hardware Repair
    • CD-i Title Development
    • CD-izi Authoring Tool
  • Downloads
  • CD-i Emulation
    • CD-i emulator 0.5.3 beta 5 – Titles compatibilities
  • Chronicles
  • High Scores
  • Forum
  • My Account
    • Login/Logout
    • Messages
  • Contact us
    • Website’s History
  • Register
The World of CD-i

Archives

Flashback – Tips


Flashback

Level select:
EASY
Level 1 – ZULU
Level 2 – HAIGHP
Level 3 – MIKEY
Level 4 – RIGHTS
Level 5 – SCENE
Level 6 – GRIND
Level 7 – ONPTRC


Level select:
NORMAL
Level 1 – MOTION
Level 2 – BADGES
Level 3 – RESOH
Level 4 – HOURS
Level 5 – WACED
Level 6 – THRILL
Level 7 – CAMS


Level select:
HARD
Level 1 – SKILL
Level 2 – ACRES
Level 3 – SNAFU
Level 4 – PIECES
Level 5 – PNBALL
Level 6 – FURNIS
Level 7 – DLUXE


Leave a comment |

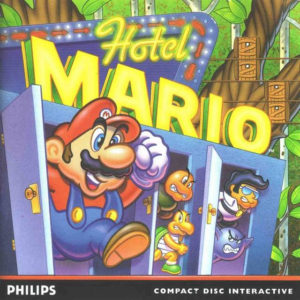
Hotel Mario™ – Tips


Hotel Mario™

Level select:
Start a new game and lose all lives in Hotel 1, Stage 1.
Save the game writing ‘B_ ‘ (letter B, underscore, space). Load this saved game and you will get access to all the 7 Hotels.


Hotel 3 – Go from Stage 5 to Stage 8:
Enter in the 3rd Hotel top room in Stage 5 to be able to go to the 6th Hotel on Stage 8.


Hotels informations:
Hotel 1
Morton’s Wood Door Hysteria Hotel
9 Stages + Boss

Hotel 2
Roy’s HardBrick Hotel
9 Stages + Boss

Hotel 3
Larry’s Chillton Hotel
9 Stages + Boss

Hotel 4
Lemmy’s High-ate Regency Hotel
9 Stages + Boss

Hotel 5
Ludwig’s Thump Castle Hotel
9 Stages + Boss

Hotel 6
Wendy’s Blitz Snarlton Hotel
9 Stages + Boss

Hotel 7
Bowser’s Seizures Palace Hotel
14 Stages + Boss


Leave a comment |

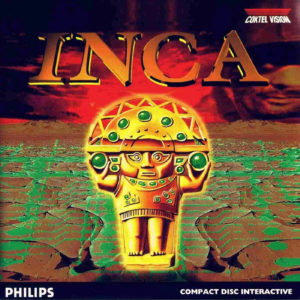
Inca – Tips


Inca

Level select:
Level 02 – 472776
Level 03 – 472677
Level 04 – 681224
Level 05 – 336742
Level 06 – 172568
Level 07 – 527179
Level 08 – 772243
Level 09 – 794221
Level 10 – 636594
Level 11 – 636594
Level 12 – 281765
Secret level – 197328


Leave a comment |

International Tennis Open – Tips


International Tennis Open – 2 Player Version

TIPS:

This is a very hard game, you will need to lost many hours playing to manage to defeat your 1st opponent.
– Go training!
– Start playing in level 1 with only 3 sets.

– From the easier to harder opponent:
Jimenez, Ullman, Andersen and Garett.

When using button 1 press:
– left or right to place the ball on the sides.
– Up for a longer ball (lifted).
– Back for a shorted ball or lob.

When suing button 2 press:
– left or right to place the ball on the sides.
– Up for a faster ball or smash.
– Back for a drop shot.


Leave a comment |

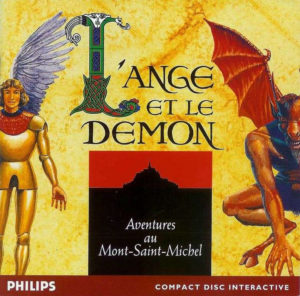
L’Ange et le Démon – Tips

L’Ange et le Démon

Level select:
Level 2 -> FLOT
Level 3 -> ANGE
Level 4 -> MONT
Level 5 -> SAGE
Level 6 -> PEUR
Level 7 -> EPEE


Leave a comment |

Les Guignols de l’Info – Tips

Les Guignols de l’Info

Level select:
Press button 2 in “WC 1” hall.
The “Go” screen will appear.
Place arrow in the clock bottom and press button 2.
A mission page will appear.


Leave a comment |

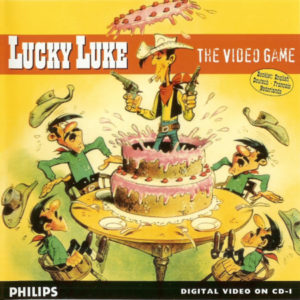
Lucky Luke – Tips

Lucky Luke

Unlimited lives and ammunition:
Press pause.
Make this code:
Up – Right – Down – Left – Down

An options screen, unlimited lives and ammunitions will appear!


Leave a comment |

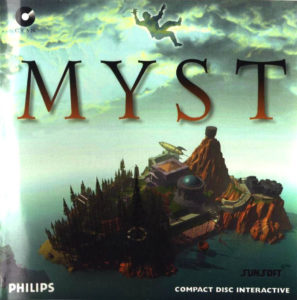
Myst – Tips

Myst

Quick play:
These steps will allow Myst to be completed in thirty minutes, without viewing the entire game.
Turn on all markers (marker switches to up positions and symbols to green). At the clock tower, rotate the small wheel twice and the large wheel eight to set the clock to 2:40. Cross the bridge and turn on the switch.

Return to the dock and turn off the marker switch (down position). Get the white page.

In the Library, look at the far right book on the middle shelf for the pattern for page 158.

Input the pattern on the door in the fireplace opening.
Save the game. Decide which ending to display and deliver the appropriate page.


D’ni Mosaic:
If you have completed the game, you will have been to D’ni, the place that you arrive in after you have used the green book in the library’s fireplace. You will also notice that the floor is a mosaic, forming a picture of a man’s face. That man is not Atrus, Sirrus, Achenar, or any other game character. The face belongs to Chuck Carter, who created a lot of the graphics for the game.


Walkthrough from The CD-i Collective.
Great work from Gir Draxa.

Myst Island
Pick up the note in front of the planetarium.

As your character explores the island, eight marker switches will be found: Pier, Giant gears, Planetarium, Spaceship, Mall with small pool and pillars, Brick building, Wooden shack, and Clock tower. Turn each marker switch on (up) as it is found. The Clock Tower switch will not be accessible until later.

In the pier, there is an entrance to an underground room. Go to the projector, and turn it off by pressing the big button at the bottom. Turn around. Notice the piece of paper on the wall to the left. Press the green button on the upper left corner, which will reveal a hidden control panel. Enter the number of switches (08), and press the button to close the panel. Turn back to the projector, push the button, and watch the man’s message to Catherine. In the library, examine each wall to find some interesting items. Place the blue and red pages in the corresponding books. Each brother wants more pages. Read the four legible books in the book-case. Ignore the book with the weird squares in it until later in the game. Note any interesting diagrams from the other books.

Look at the map next to the exit inside the library. Each of the marker switches in the island lights one specific group of buildings in the map. Grab the tower and rotate it until it flashes red, then stop. There are four “red” positions. Each of them corresponds to where one of the 4 available link books is hidden (ship, giant tree, gears, and spaceship).

The paintings next to the book case opens and closes the secret passageway behind the case. Go to the elevator, close the door, and press the button to go into the tower. If the tower was rotated correctly, the ladder with the “book” symbol should show where the book is hidden, while the ladder with the “key” symbol should lead to the clue to the puzzle that allows access to the book.

Ship: Go to the planetarium, turn the lights off (the switch is next to the door), sit on the chair, and click on the control panel. Set each of the dates from the clue (Oct 11, 1984 10:04AM, Jan 17, 1207 5:46AM, and Nov 23, 9791 6:57 PM), and map the constellation shown to one of the constellations in the Stoneship book. Go to the pillars at the mall, and click on the appropriate symbols (leaf, snake, and bug). The book is in the now resurfaced ship.

Tree: Go to the wooden house, and enter the combination for the safe next to the door (7,2,4). Open the safe, get the match, and light it with the matchbox. Turn around and light the pilot light below the boiler. Turn the gas wheel all the way up (green icon). Wait until the thumping sound stops, then turn the wheel all the way down (red icon). Quickly get out of the house and into the tree to the right of it (see library map for location) before the “elevator” in the tree goes underground. If your character cannot do it that quickly, do not turn the gas all the way off. The book is down beneath the tree. If your character went up in the elevator, press the white button to the left. That releases the steam and drops the tree down to the underground level.

Gears: Go to the clockhouse, enter 2:40 into the clock using the wheels, then press the button. Go into the clock, and use the levers to set the wheels to 2,2,1. Hold either front lever down to rotate the middle wheel only. Click on the vertical lever to the right to reset the puzzle. The book is in the giant gears close to the pier.

Spaceship: Go to the brick building. Set the generators to send exactly 59 volts out (buttons 1,2,3,6,7,8 and 10 should do nicely. The numbering order is on the wall as your character leaves the control room. In order to figure out which button has which voltage, just hit them one at a time). If it goes over 59 volts, a fuse will blow. There are two electric towers to climb: one next to the brick building, one clearly visible close to the spaceship. Click down the breaker switches to reset them, and try to set the voltage to 59 volts again. When completed, enter the spaceship. Play the notes from the Selenitic Age book in the organ. Set the same notes in the controls of the ship. Count number of notes from the bottom. (8, 20, 23, 13, and 6, respectively, including the bottom as one). Press the button and the book will appear.


Stoneship Age
Go to the other half of the ship, up the stairs and look through the telescope. Find the location of the lighthouse (135 degrees). Go to the umbrella and push the button on the right to drain the lighthouse. Go to the basement and drain the chest by opening and closing the valve at the bottom. Go back to the umbrella and push the button to the right to let the lighthouse fill up again. Unlock the chest that is now floating, get the key, and open the lighthouse.

Crank up the generator and power the battery. Note that the battery is discharging slowly, so move quickly! (If the lights go out, go to the generator and crank it again.)

Go to the umbrella, press the middle button to drain the rock and go inside. Go all the way down the tunnel, find the page for either of the brothers, and explore. Half of an important note can be found in the map drawer in Achenar’s room (the messy room). The entire note is given below.

Go back to the red-lined “panel” in one of the walls. Inside is a compass rose, similar to the one in the Stoneship book. Push the “SE” button (the clue is 135 degrees; the thirteenth button clockwise from the top, found with the telescope). This will turn on the submersible’s lights.

At the umbrella, drain the ship with the button on the left and go inside. Click on the desk in the lower level, and the book leading back to Myst will appear.


Selenitic Age
Find the 5 microphones (Water, Fire (thunder), Clock, Crystal (flute), and Wind), and turn on each of them. The red and blue pages are at the “Crystal” and “Water” microphones, respectively.

Go to the microwave tower through the Wind tunnel, and aim each of the five dishes in the right direction (use sounds, icons, and places as a guide). The coordinate numbers are: Water: 153.4, Fire: 130.3, Clock: 55.6, Crystal: 15.0, and Wind: 212.2. Push the sigma button. This will reveal the sound sequence to open the door near the spaceship. (Crystal, Water, Wind, Fire, Clock)

Open and enter the door, get in the underground craft and press forward. At each station, listen for a sound that will indicate direction. If it is missed, press the button on the speaker. The sounds are “plink” for north, “bloooop” for W, “plonk” for S, and “shhhh” for E. Combinations of these sounds indicate NE, SW, etc. The sequence of directions to get to the Myst book is: N, W, N, E, E, S, S, W, SW, W, NW, NE, N, SE. Get out, and find the Myst book.


Mechanical Age
The pages for the brothers are in secret rooms accessible from their chambers. Explore next to the “throne” in each room. Go to the “tube”, and press the button in the hallway. The floor will reveal a lower room. Go down there, and rotate the tube until the red icon shows. Be careful not to let the tube rotate past the red icon. Go back out, and your character will see that the tube held an elevator. Press the wall button again to close the floor, and enter the elevator. Press the up button, then press the “middle” button and exit the elevator before it descends.

The building rotation controls are above the elevator. Enter the rotation controls and rotate the tower to the other two islands. They have the symbols for the control next to where the Age was entered.

Use the simulator in Achenar’s room to practice how to rotate the tower. The method to be used is: Push the left lever up one notch. Hold the right lever all the way up for about seven seconds. Let go of the right lever, then quickly pull the left lever back down. Practice on the simulator until the timing is right, because your character will not be able to see the orientation of the tower.

Once the tower stops, it will make a sound for each of the four compass directions, the same sounds as for the Selenitic age, above.

The control panel next to where your character entered opens the room where the Myst book is located. The symbols are: an O with the bottom cut out; a downward-pointing down triangle next to rectangle next to a upward pointing triangle; a circle over three triangles; and a solid left half circle


Channelwood Age
Go to the windmill and turn the water on using the faucet on the floor. The pull-down lever is not functional. Go back down and use the “switches” in the pipeline to control the water flow to the first elevator. (Not the one next to the staircase) Climb in, close the door, and use the lever to go up.

On this level, find the control to open and close the staircase. Go to the staircase, climb down, open the door, and use the pipeline switches to send water to the generator that is next to the staircase. Climb back up the stairs, and use the elevator at this location.

Find the rooms for both brothers (and Achenar’s “temple”). Their pages are located at those locations. In Sirrus’ room (the nice room), find the other half of the note that is located in the Stoneship Age.

Use the switches to turn on the lone generator close to where your character entered the world. Turn it on, and watch the catwalk appear from the water. Walk to the other side, down the other walkway, and find the crank to extend the pipeline back to the main line. Use the switches to turn on the elevator there, and climb up to find the Myst book.

(To figure out where the water is going in the pipelines, listen as your character walks past them. If the sound of water cannot be heard, this section of the pipeline has no water. Also, your character could trace the water from the windmill, checking every Y junction as it is passed.)


Dunny Age (Final)
When four pages are returned to either brother, he will reveal the following information: go to the library, pick the right-end book in the center shelf, and look up diagram 158. Go to the chimney, press the button, enter the diagram below on the plate, press the button again. Your character will see the green book (the Dunny Age), the blue page, and the red page.

SEE DIAGRAM AT THE BOTTOM

There are 4 endings: Give the last blue page (Achenar traps your character). Give the last red page (Sirrus traps your character). Go to Dunny without the white page (your character is trapped). Go to Dunny with the white page (The father goes back, destroys both books, congratulates your character, and asks you to remain for further adventures)

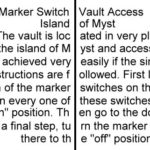
The white page is in the vault. To get to the vault, follow the directions in the two halves of the note.

SEE THE BOOK AT THE BOTTOM

Diagram
Book


Leave a comment |

Secret Mission – Tips

Secret Mission

Overtake the 1st labyrinth:
Once in the labyrinth, do this way:
– Turn left
– Turn right
– Turn left
– Turn right
– Turn left
– Turn right


Open the Thug temple door:
Once in front of the door, insert this code:


Overtake the 2nd labyrinth:
Once in the labyrinth, do this way:
– Go front
– Turn right
You will arrive in a cavern with root.
Once in this cavern, push the root and a board will fall!
Now, you need to give this board to the old man.


Overtake the 3rd labyrinth:
Once in the labyrinth, do this way:
– Go in front
– Turn left
– Turn right
– Go in front
Now you can give the board to the old man!


The phone number:
Once in your hotel’s room, take the phone and compose this number:
1837


The palace piano:
To open the hiding-place, you must compose theses notes in the piano:
(attention, you don’t have a lot of time)


The doctor laboratory:
To re-find your memory, you must do this mixture:
4 x red
2 x blue
1 x yellow


Desactivate the bomb on the elephant:
Once on the elephant, do this code:
Pull the 12:00 hours pin (with green wire) when the needle is on the green bar.
Pull the 15:00 hours pin (with yellow wire) when the needle is on the yellow bar.
Pull the 19:00 hours pin (with red wire) when the needle is on the red bar.

Walkthrough from The CD-i Collective.
Great work from Gir Draxa.

“HEADACHES AND HIGH HEELS”

What do you do when you don’t know anything? Explore! So get on your feet and do so! Your
hotelroom has some valuable stuff lying around. Get the bottle of chloroform from the bed.
Get the ashtray from the table. Get the towel from the wash-basin. Look at the smallest
of the paintings on the wall; it’s some kind of hieroglyphics. There’s some kind of a
motto too: “The Nile at high tide”…

During the search the phone will ring. When it does, pick it up and talk to the man at
reception desk. He tells you there’s a charming person waiting for you downstairs. Before
you run off to check this babe out, get a hold of yourself and try at least to examine
your room in an orderly way. She won’t run off at once! You’ve got enough time to pick
up all items, even if you do so after the phone call.

Once you’re downstairs, you’ll meet the lady in white. No matter what you answer her, lunch
will still be the outcome! Wishing real life was that simple, hey? Better be glad,
because this beautiful high healed lady is Natasha and she’s Russian Intelligence. She
tells you you’re Jeff and that you’ve arrived by plane last night, here in Opelia. A
traitor knocked you out – which caused this amnesia – but he was taken care of by some other
Boris. She also tells you you’re a Russian secret agent and – above all – you’re a double
agent. Natasha herself is your superior. Your mission is to retrieve some documents.
These documents have information on the planned assassination of the king. Prime Minister
Vishaka is the main suspect as he would be the follow-up of the king. Your mission, should
you accept it, is to find these documents.

When diner is over, you return to your hotel. Natasha tells you the Americans are also chasing
the documents. Last thing; some local agent will contact you to help you with your mission.
Then she leaves. If you might wonder if you should try the ‘nightcap suggestions’
trick, don’t bother… it’s morning, hot shot!


“COYOTES AND CHLOROFORM”

The Black Lotus Hotel
Left alone in the hotel, ask yourself why they should give valuable info to a double agent.
When they know you are one, they also know you’re going to spoil this info to the enemy. So
this makes most info have zero value! So… this double agent thing, is that true? Or are
the Russian just the first that got onto you? Truth is out there, so trust no one! Spooky!

At reception desk, there’s an envelope for you. Ask the reception manager for the
mail and go to your room. There you open the envelop (with “my holiday in Egypt” written on
it) and look at the negatives; there’s one of a pyramid. Then leave the hotel.
Outside there’s a riksja to take you to places. Choose any locations possible, it won’t
matter at all because you will be taken to Hinson Park.

Hinson Park
There you meet an (presumed) American, called Coyote. He’ll tell you about the plot and the
Thugnots. Some assassin jumps from the bushes but is shot by Coyote before he damaged
any vital bodyparts. Run off but not before you picked a white rose from the rosebeds.
Run off in any direction you like.

Doctor Stone’s Office
Go to Stone’s office and enter the waiting room. Charm his lovely secretary and then
walk to the table. Read the newspaper, there’s an article about Vishaka, being the son of
the barbarian Thugnots. Some holy necklace should be proof of it. Hmm, interesting! There’s
also mentioned that somebody called Ingleton has spent some time with these Thugnots. This
dude might have some handy info on the thugs.

Look at the sheet of paper that’s on the closet behind the secretary. It’s a list of
codewords for Nicky Boom, whoever that might be. Passwords are Medit, Kratty, Mirtes and
Arrax… Now use your inventory; use the chloroform on the white rose (it’ll show a rose
with some Z’s). When the doc calls the other patient and the guy has left, give the secretary
the rose. She’ll sniff and pass out. By the way; you might have examined the vase with red
flowers already. This will tell you the girl loves flowers. When the girl has fainted, check
out the things I mentioned above if you haven’t already. When the doc calls you, go
through the doorway and to the right. The doc is sitting behind his desk and you talk to
him and tell him his secretary has fainted. He’ll leave in a hurry, leaving you a chance
to search the office. Get the blue ink and the stethoscope from his desk. Then click on the
picture of Penelope, his secretary. Then leave.

The Black Lotus Hotel
Go back to your hotelroom. There use the negatives on the small painting. Move the negatives
to the upper left side, as far left and up as possible. Then move it 12 times down and
12 times to the right. A hidden message appears; “Come to the Dragon Club, comrade.
Password is ‘Elephant’. My answer is ‘African or Asian?'”.

Hinson Park
Go to the brush the assassin used for his ambush and find an ancient coin with a dragon
on it. Go to the Dragon Club.

Outside The Dragon Club
Go to the left and talk to the old man. Buy the necklace, it’s a Thugnot one! Might come in
handy! Ask about the spear and hear that he’ll give you the telephone number of Ingleton,
the Thugnot specialist, when you bring him a real Thugnot spear tip.


“RATS, CROCS AND DRAGONS”

The Dragon Club
Enter the club and go to the barman, he’s your contact. He’ll tell you a guy called Salaam
was bribed to let you in. Barman also tells you the documents are probably in the library,
as Vishaka spends a lot of time there and doesn’t allow anybody to come there.

The Palace
Go to the palace and talk to the guards near the gate. One of them is Salaam, but he can’t
let you in. Vishaka has tightened security and it he’ll lose his head when he lets you in.

The Dragon Club
Return to the club and talk to the barman. He is sure rumors got to Vishaka which made him
put more guards on the job. Ask him to go in your place but he’ll refuse… well, for
a measly 500 bucks he’ll do so. As you don’t have that much money, go to the guy with
the white necklace. Ask him about the room. It’s a secret gaming room which not everyone
can enter. Go to the big guy that’s guarding the door to the secret game room and give
him the dragon coin. He’ll step aside to make room for you. Enter!

The Secret Game Room
Down in the sewers, you can gamble on some kind of rat race. One bet costs you $100 but you
can win $300. That makes a profit of $200 when you win the game. And this is how to win it!
The rat has a certain order in choosing it’s gate and this sequence won’t change; it
repeats itself. If we give the left gate number 1 and the right gate number 4, this is
the order in which gate the rat appears: 1 – 4 – 1 – 3 – 1 – 2 – 1 . After this sequence,
it’s starts all over again. There’s one ‘but’ to this sequence; the crocodile. Anytime
during the game, a crocodile can appear to eat the rat. By this, the bank gets all the
money. More important is this: every time the rat has been eaten, you should always choose
gate 4 for your next bet! After this ‘4’ you should proceed with the order of gates
mentioned above.

When you have enough money (maximum is ‘over a thousand dollars’), return to the bar. Talk
to the barman and give him the money he wants. He’ll be off to the palace to do your job…

The Palace
Enter the building inside the palace walls. At the end of the hallway, turn left and enter
some kind of pool room. Go to the spears and get them; a spear tip will break. Take it.
Leave the room and take the other room, right at the end of the hallway. Examine the bookcase
and the marble statue. When you hear Vishaka talk to his colonel, go to the dark
corner of the room (upper right of the room). Wait for Vishaka to enter the room and see
him put the necklace around the statue to open a secret passage! Leave the palace and return
to the Dragon Club. There the barman will tell you all about his adventures in the Palace
and give you the spear tip.

Outside The Dragon Club
Lave the bar and go to the old man. Give him the spear tip and receive Ingleton address
and his phone number; 212 213. Go to…

The Black Lotus Hotel
Go to your room and use the phone to call Ingleton.


“LIVE AND LET DIE”

Ingleton’s House
Go to the old man and enter the house. Talk to him. Ask him about the Thugnots. It’s
a long story, but him mentioning the Thugnots being afraid of worms might be wise to
remember. Ask him about Vishaka. Ingleton confirms he’s a real Thugnot. Ask about the
necklace. It’s made of 50 tiny human bones and is the Thugnots’ symbol of divine protection.
If you want the real necklace you have to go to the Thugnots village. The ones you can
buy in the city are fakes, made by Ingleton himself… hum… Ask again about the
necklace. Ingleton tells you need 2 things when you go to the Thugnot vill; a guide and
a map. He’s got a map he will give you but he hides it safe… Bang! A red stain spreads
over Ingleton’s chest while his eyes turn away. Assassins! Damn! They shot the old man before
he could tell all. Go to the end of the room, which has a garden view, and see the killers.
Go back and get the knife from the table. Go to the chest at the left side of the room and
use it to open the chest. Inside you’ll find cartridges. Close the chest and get the rifle
from the wall. Go around the left corner and get the jungle outfit. Go to the instrument
and use it. First time you play it, bits of plaster will fall from the ceiling. Second
time you play it, the tiger head on the wall will move a little. Third time you play the
instrument, the head will fall down and leave some broken teeth on the floor.
Get a tiger tooth.

Go back to Ingleton and look at the small painting. There’s a safe behind it! Use the
stethoscope on the painting. To open the safe, move the left and right arrow on your keyboard
to reveal the window. To change the combination, use the space bar. Combination from left
to right wheel is 3 – 3 – 1. In the safe you’ll find a map. Then go back to the garden. Now
you have the rifle and cartridges, shoot the killers. Start with the one in the middle, as
he has the best shot at you. Shoot them while they come up from behind the wall. When you
shot them all, walk to the house at the upper right part of the garden.

Mansour’s House
Enter the house and walk to the right. Get the wooden hammer and go outside again. Use the
hammer on the gong and Mansour, Ingleton’s servant will appear. Talk to him. He only will
take you to the jungle when you have a map (show him your map), a decent outfit (show him
the jungle outfit) and a useful talisman. Give him a tiger tooth. It’s broken so it’s only
good for anti-gnat purposes. You should have a tiger tooth or a blue parrot feather…

The Black Lotus Hotel
Go to reception desk and ask for your key. The clerk will look for you…and it will
take some time! In the meantime, you get the bird. It will loose a feather. Pick it up.
Use the white feather with the blue ink and, voila, a blue feather! The clerk will
tell you he can’t find your key. Okay, have a nice day! Leave the hotel.

Mansour’s Home
Go back to Mansour’s. Show him the blue feather and tell him you got al the stuff he asked
you to get. Your ready to go except a means of transportation. So find a motorcycle.

The Dragon Club
Enter the club and go to the man in the brown suit to the left of the entrance. Talk
to him and find out he wants to sell his motorcycle for $1000. When you don’t have
this money, play again in the secret playroom to win some bucks. If you have the money,
pay him and get the key. Leave the club and go to the motorcycle. Use the key
on the motorcycle. Watch the movie of your motorcycle trip to Mansour.

Note: Now you know what you need before Mansour will accompany you, you might as well
arrange everything before you go to him. That’s prevents you from making the boring
walk to his home several times.

The Bridge
After you got all dressed up, the both of you leave. Then you find the bridge destroyed. Go
to the wooden stick with the rope and get the plank hanging from it. Then walk to the palm
trees. You’ll find a parchment with sketches under the biggest tree. You can also find a log
under the most right palm tree that’s colored dark green. Use the log on the road, between
the two stakes. Then use the plank and a beautiful springboard is ready! Get on your bike
and jump! As you nearly make it, Mansour saves his bones by hanging from the cliff. Go
to the edge and talk to him. There’s no other option for him than to go back by a path
which leads down in the ravine. You’re on your own again.


“TO THUGS OR THUGNOT?”

The Jungle
From the motorcycle walk east. Pass the totem and the skeleton and walk into the jungle.
It’s same maze construction in which you should look for the following screen; a sandy
clearing with pale green palm trees on the far and of the clearing. If you look
north, you will see that the brown sandy part is divided in two by some strip of green
vegetation. The sandy piece above this green strip is smaller. You should go to this
smaller brown strip and walk west. It might take some time, but this is the best way I
can describe it. When you have taken the right passage, you’ll end up on a beach or sand
strip with a plane. Walk north, away from the plane and reach a waterfall. Go west and go
past the waterfall. Notice some rocks falling down. You can’t go all the way west, so you
return and again cross the waterfall. You almost fall but when you stay close t the
right side of the waterfall, you will fall down after a while…

Under Water
When you fell down, you’ll be floating in the river itself. To swim, you first have to
dive (arrow down). Dive a little and swim to the right of the screen (arrow right). Go
up again to inhale and dive all the way down. You’ll go through a secret passage to the
right and enter some underwater building.

Swim to the right and go up through the broken floor. Go right again and inhale at the
compartment containing air above you. Than swim back to the broken floor, go down and
go right till you reach some kind of coffin. Hover above it and swim down till you hear
‘klonk’ and see bubbles of air escape from the trunk. Swim back to the place where you got
some breathes of air. Leave again and swim all the way to the left on this floor (don’t
go up or down) till you reach the gate. It’ll open and you must swim to the top of your
screen. Now you’re in a cave.

Cave And Tunnels
In the cave, go behind the big stone at the far end of the pool. There’s a matchbox there.
Get it. Now go to the tight alley up north and squeeze yourself through. Might be a tight
fit, but it’s possible. In these dark tunnels, first go left and then forward 2 times. Then
turn right and go forward 2 more times. You should be near the Thugnot village now.

Thugnot Village
Wait till Vishaka (the guy in red) and a guard have entered the village. Then walk to the
remaining guard and talk to him about the tourists and Vishaka. Won’t work! Then tell him
‘adios’ and go back to the cave again. The guard will enter the village and when he’s out
of sight, go back and enter the village.

The village is divided in three screens. The one with the gate is the middle one. Walk to
the hedge in front of you. Use it and get some camouflage. Then go to the building with the
mask on it. On the corner is a banana tree. Be careful; only walk in front of the
building when the guard walks away from it. Get a banana from the tree. Enter this cabin
and examine the statue. Notice the signs on it. leave the hut. Then walk to the right and
get behind the building with the waving guard in front of it. Walk towards the walls and
hear Vishaka talk to his people. Leave and go to the hut that to the upper left of this
screen. Give the gorilla the banana and he’ll climb the statue. Look at the signs on the
statue. Leave the cabin and go to the cabin on the upper right. Enter and examine again
the signs on the statue. Leave the hut. Now go all the way to the right to enter
another part of the village.

Enter the big building in the middle, it’s a school. Examine the blackboard. You see again
the signs you already saw on the statues. Notice that the word CEKI is explained in signs.
KIMA is a word with only the first signs shown. There’s no explanation of the word
MACE… Now the Thugnots have 3 word-parts from which they create words; CE, KI, MA
and TA. By deducting you noticed that the word CEKI is written by 2 symbols; a kind of W
and some kind of V with a small stripe. From here I’ll mention these signs as ‘W’ and
‘V-stripe’. As KIMA ends on MA, the third sign you know should stand for MA; this is the
crossing between T and W, or the anchor like sign. From here I’ll mention this one as
‘Anchor’. As you now know what CE, KI and MA have as symbols, you can write MACE yourself;
‘Anchor’ and ‘W’!

Last thing you should notice is the slogan on top of the blackboard: ‘KICEKITAMACE’.
Now go to the most right part of the village, to the Big Blue Statue.

Big Blue Statue
The statue has a lock of 6 buttons to the right of the door. These 6 buttons are
represented by the slogan you saw on the blackboard, which has 6 parts: KI CE KI TA MA CE.
But there’s a problem; you don’t know the sign for TA. That is the 4th sign on the lock;
some kind of V with a dot to the right of it. From here, I’ll mention this one as ‘V-dot’
Now open the door by entering the signs for KI, CE, KI, TA, MA and CE. That’s: V-stripe, W,
V-stripe, V-dot, Anchor and W. You’re the greatest!

Secret Room, Caves And Tunnels Again
Go to the statue and get the Thugnot necklace; the real one! See and hear a gate open to your
left. Go to the crate with the pamphlets and take one out. Now go to the barrel with the
hole in it, just beside the crate with pamphlets. Use the pamphlet on the barrel. Then
use the matches on the pamphlet. It will explode in a minute! Go towards the gate, in the
hallway left of the statue and just behind the left torch, ad enter it. The gunpowder
will blow the room to pieces. If you don’t blow up the room and enter the hallway, you can
see how a guard enters the room; there’s no way back then!

In the tunnels, go forward and turn right at the first crossing. You’re now in a clearing.
Pull the shortest of the red roots and a wooden club falls down. Get it. Walk to the right
and enter the tunnels again. Go left, right and two times forward to get to…

The Cave Of The Hermit
Talk to Nawi the hermit. Always choose the first answer sentence in this conversation. After
a long debate, he chooses to give you the canoe. Give him the keys to the motorcycle and
he will call the dog (now you can get to the canoe). Give him the wooden stick you found
in the cave and he’ll give you his paddle (now you can use the canoe). Exit the cave and
use the canoe. Enjoy the paddle into town.

Back In Town; Your Hotel
Go to your hotel and ask reception desk for messages. There’s something for you! Go to
you room and read the message, it says: “Miami beats Dallas 37-18”. This is a secret code.
There’s also a message from Coyote, asking you to come to the park. Use the telephone and
dial 1837, being another order of 37-18. Natasha will take it and she asks you to meet
her at the restaurant Virtuous Way.

Restaurant ‘The Virtuous Way’
An auto-dialogue part is up for you. Natasha urges you to go to the palace. There should
be a secret passage, according to information the Russians have received. You run off but
first want to pay a visit to the doctor as memory still isn’t what it used to be. Sorry,
he closed his surgery!


“PUTTING PUZZLE PIECES IN PLACE”

Hinson Park
In the Hinson Park you meet Coyote again. He tells you to bring the documents to the US
embassy as soon as you got them. You also receive 1000 bucks. You also see the Doctor’s
secretary sitting on a bank. Of course you would like to know why the doctor left. Argue
with the secretary before exiting the park. She says that the doctor is going to see a
beautiful Russian woman. So Doctor Stone knows Natasha!

Of course you are very keen now to visit the doctor. But the secretary has the keys.
Use the rose and chloroform together again. Roses can still be picked from the rosebeds.
Give her the rose and, as she has fainted, search her body and take the keys. Leave the
park.

The Doctor’s Office
Go to the doc’s room. Read the telegram on the desk. It says: “Jeff Memonium
Reaction Positive – Total Success. The telegram proves that doctor Stone drugged you.
Open the drawer on the left of the chair using the bunch of keys. The drawer contains
the formula for the antidote (4 red – 2 blue -1yellow). Note the formula on the cover of
the magazine in colored balls! Have a look at the laboratory against the wall behind
the screen. You see a red and a blue fluid. You can’t prepare an antidote yet, because
the yellow fluid is missing. Time to get it!

Looking For The Yellow Fluid
You remember that Natasha said there should be an underground passage to the palace.
The game room in the dragon club is located in the sewers. Go to the dragon club.

The Dragon Club
Enter the club. Go to the play room. Talk to the Thug. He tells you to get out. You push
him into the water, where he’s torn up by the crocodile. Use the canoe.

The Palace
You arrive at he left room of the palace (where you took the spearhead before). Leave
the room through the corridor. Go to the library. Use the necklace on the statue
to open the secret passage. Go through the passage into the secret room.

The Secret Room
You see a papa-goyo barrel. This is the liquid you need to restore your memory. Take it.
Try to take the statue on the desk. The organ plays. Use the organ in the room to reproduce
the music that is heard when you tried to take the statue on the desk (respectively buttons
3, 7, 8 and 6 from the left to the right). Listen to the music before one of the pipes
opens to reveal a secret parchment with assassination plans. Leave the secret room and go
back to the room with the pool and the secret passage to go back to the playroom and the club.

The Doctor’s Office
After you left the club, go to the doc’s office. Get back to the mini lab. Use the barrel
of papa- goyo on the mini laboratory against the wall behind the screen. Now you can mix
all three ingredients. The proportions are: – 4 drops of red liquid, 2 drops of blue
liquid and 1 drop of papa-goyo.

Follow the exact order. Move the tube under the different potions and click as many times as
drops you need. Pour the mix in the glass on the right and drink (take) it. If you mixed
wrong; dump it to the left. Your memory is coming back. You see doctor Stone who gives you an
injection, while Natasha is just watching . Now you understand the Russian plan. The Russians
knew that you were sent by the Americans to prevent the coup d’etat. They caused your amnesia,
so that they could convince that you were a double agent. Once that you would have found the
documents and the King was killed, Moscow could get hold of Vishaka. Before you leave, have
a look at the secret documents that you found in Vishaka’s palace. They say: ‘A bomb…the
Kings elephant…1500…1200…1900.” Must be times. Leave the doctor’s room.

Grand Finale & Great Fiesta!
Go to the United States embassy. The ambassador asks if you managed to get hold of the
documents. Answer (yes). You hand over the documents. The ambassador orders you to
neutralize the bomb. The driver takes you automatically to the royal elephants. When arriving
near the royal elephants, pay attention to the way in which the elephants react to the orders
of the elephant keeper. Wait for the departure of the elephant keeper. Now consult the secret
documents again: “A bomb…the Kings elephant…1500…1200…1900”.

Approach the elephant on the left. This is the elephant with the bomb. Tell him, in this
order: ‘Houngawa Timba’ and “Hunka Kapa.’ You’ll find the bomb.

To defuse the bomb, the wires that have to be disconnected. The wire color must correspond
with the color of the bar the seconds counter is in.

1. Pull the 1200 hours pin (with green wire) when the needle is on the green bar.
2. Pull the 1500 hours pin (with yellow wire) when the needle is on the yellow bar.
3. Pull the 1900 hours pin (with red wire) when the needle is on the red bar.

You defused the bomb, saved the day and festivities can start! Congrats!


Leave a comment |

Space Ace – Tips

Space Ace

Choose a level:
Lose all of your lives and wait to “play again ?” screen appear.
Once in this screen, do this code using the arrow:

Go to the top – left, press the left button and keep press. In the same time press 4 times the button 2.
Go to the top – left, press the left button and keep press. In the same time press 3 times the button 2.
Go to the top – left, press the left button and keep press. In the same time press 1 time the button 2.

A special screen will appear with 13 levels to choose.


Leave a comment |
« Previous Page
Next Page »

CD-i titles

  • [01] Games (144)
  • [02] Kids (82)
  • [03] Multimedia (275)
  • [04] School 2000 (8)
  • [05] Homebrew (7)
  • [06] Music (31)
  • [07] Karaoke (197)
  • [08] CD+Graphics (24)
  • [09] Photo-CD (41)
  • [10] Digital Video on CD-i Movies (21)
  • [11] Digital Video on CD-i Music (14)
  • [12] Video-CD Movies (128)
  • [13] Video-CD Music (17)
  • [14] Video-CD Others (39)
  • [15] Video-CD Sampler / Demo (6)
  • [16] Web-i / CD-Online (5)
  • [17] Internal Use (1)
  • [18] Professional (98)
  • [19] Promotional (16)
  • [20] Demonstration Only (52)
  • [21] Free Demo Discs (19)
  • [22] Tutorial discs (2)
  • [23] Testing Discs (86)
  • [24] Unreleased (46)

More…

  • Catalogue #6900000-0 (USA) (223)
  • Catalogue #69900000-0 (Europe from USA) (24)
  • Catalogue #8100000 (Europe) (156)
  • Catalogue #8110000 (United Kingdom) (101)
  • Catalogue #8120000 (France) (179)
  • Catalogue #8130000 (Germany) (123)
  • Catalogue #8140000 (Netherlands) (200)
  • Catalogue #8150000 (Italy) (57)
  • Catalogue #8160000 (Iberica) (47)
  • Catalogue #8170000 (Scandinavia) (8)
  • Catalogue #8180000 (Belgium) (29)
  • Catalogue #8190000 (Worldwide) (46)
  • Catalogue #PCIM/X-00000 (Japan) (27)
  • Catalogue PC/MAC (17)
  • CD-i Bridge (21)
  • CD-i Ready (40)
  • Exclusive Regional titles (398)
  • Interviews (4)
  • Reviews (24)
  • Tips & Tricks (23)
  • USA Release (43)

Search titles

Guess the picture!

Recent forum topics

"Some" commercial Video-CD won't …by richard.mayerHello, I am completely new to the CD-i platform but I am very i … Read More7 days ago
Announcing CD-i Emulator version …by CD-i FanA new beta release of CD-i Emulator is now available from the Down … Read More4 weeks ago
Hello to all CD-i Fans !by DataProHello, I am french too. You're welcome. I think I got … Read More2 weeks ago, 1 Reply
UK CD-i Magazine Indexby oonagootasoloI've just uploaded an index of the contents of all 20 issues … Read More3 months ago
Announcing CD-i Emulator version …by CD-i FanA new beta release of CD-i Emulator is now available from the Down … Read More5 months ago

CyberChimps WordPress Themes

© The world of CD-i [Please add credits to us when using any content from this site]