• What is the CD-i?
    • CD-i Players
    • CD-i Accessories
  • Open Source
    • Hardware Development
    • Hardware Repair
    • CD-i Title Development
    • CD-izi Authoring Tool
  • Downloads
  • CD-i Emulation
    • CD-i emulator 0.5.3 beta 5 – Titles compatibilities
  • Chronicles
  • High Scores
  • Forum
  • My Account
    • Login/Logout
    • Messages
  • Contact us
    • Website’s History
  • Register
The World of CD-i

Archives

Alice in Wonderland – Tips


Alice in Wonderland

Walkthrough from The CD-i Collective.
Great work from Gir Draxa.


PART 1
Alice is not an especially difficult game, but there are some tricky parts to it.
This walkthrough (of sorts) should help you over the rough spots.
When playing the game, it helps to talk as much to people as possible, although there is usually one way of talking to them (coax, argue, etc.) that will produce the best results.
It’s also fun to read the various signs along the way; some are just funny, but many contain useful clues.
Don’t be afraid to explore all the doorways, just save the game first.
Some will not lead you anywhere important, but may contain clues needed to finishing the game.
Always pick up objects that are takeable, they will be useful somewhere along the line.
Before going down the Rabbit Hole, it is important to obtain the tin of comfits from Alice’s sister, as well as the parasol from the Reverend Dodgson.
You can coax the sister to give you the candy, and argue with the good reverend for the umbrella.
The White Rabbit can be teased to give you the answer to the Caterpillar’s riddle.
Then it’s down the Rabbit Hole!
This part is pretty simple, you just keep going down most of the time.
You can actually skip the singing mouse (he wants the marmalade from the pantry), since his song isn’t used anywhere in the game.
When you reach the Cheshire cat (my favourite character) sitting on the rock, you’ll note a door off to the right.
You can’t reach it now, but you’ll be coming back this way later, so just keep on going down.
Eventually you will come to bottom, and reach a room with cakes.
The cakes make you taller, and elixirs make you smaller.
First jump to the cakes and get all of them.
Then go back down, over to the next room, and jump up four blocks.
Eat a cake, jump over (parasol open) to the ladder and climb up.
Get all the elixirs, then return down and to the cake room.
Just left of the doorway there is a tiny door.
“Eat” two elixirs, and you can enter it.
You are now in the upper room.
Eat a cake, jump over to the table, and get the cake and elixir there, then jump over to the rope.
Don’t climb the rope, instead walk off the left edge and open the parasol.
You’ll float down to the table with the key.
Take the key, jump off, and return to the ladder room.
Go up the stairs to the small door, eat an elixir, and pass through.
You’re now above the Pool of Tears.
Enjoy another cake, then jump in and swim awhile.
You can pass by the second Rabbit Hole, the seashell in there isn’t all that important (but, you can get it if you like). Keep swimming, and you will reach the beach, and you are now in Wonderland proper.


PART 2
Ok, so now you’re on the beach with the Dodo.
He has an important item, which you can obtain by giving him the tin of comfits.
Once you have the stick, keep moving to the right.
The second Alice is not all that important, but talking to her will give you some extra information.
Continue on up the hill, where the White Rabbit show up again.
He’ll mistake you for his maid, Mary Ann.
Don’t worry about it.
Tease him, and he’ll drop his fan and vanish.
Get that and keep going to the house.
Once inside, go to the door on the right and enter it, then go up the stairs.
Mary Ann isn’t all that important, but you can talk to her until she disappears.
Then go enter the doorway.
This takes you to a new room, where there is a fireplace.
Go thru there, and just follow it along.
Eventually you’ll find the Mad Hatter’s missing teacup.
Take that, and continue on and out of the fireplace.
Now you’re back downstairs again.
That’s all you need here, so leave the house, and move along to the right.
When you come to the swing, climb up and get all three teapots.
After that, continue to the right.
The puppy will get in your way, but leaves when you offer him the stick (talking will do no good, so don’t even bother trying).
Pass up the tree with the rope, you aren’t ready for that yet.
Continue on to the Caterpillar.
Along the way, pick some mushrooms, the white ones make you grow, and the purple ones make you shrink.
There is a second use for the mushrooms, but that comes later.
Ask the caterpillar why he’s doing that, and he’ll ask you a riddle.
The answer (which you should have gotten from the White Rabbit earlier), is “top hat” (Queens, being women, wouldn’t wear such a thing).
Remember the clue the Caterpillar tells you in return.
You’re done here, so move along to the right.
The Cheshire cat pops up again; you can amuse yourself by talking to him for a while.
After that, continue on until you reach the Town Hall.
Argue with the Clerk, and he’ll drop a Memo for you before he vanishes.
Pick that up, and then head back left, stopping at the Duchess’ house.
Climb up, making sure you get the muffin along the way.
Talking to the Duchess is not in the least important, although it does have its funny side.
What you really need to do is get to the room above, but you don’t have what you need yet.
So, go down the stove in the kitchen until you come to the clock.
Simply walk off the clock and open your parasol.
Climb down from the housetop and enter the house.
Go left and enter the door.
Inside is the March Hare, suffering from a broken heart.
Argue with the poor creature, and he will leave you a whisker before he disappears.
Take that, leave the room, and go upstairs.
Take the first door on the right to the Bathing Machine, and then enter it.
Go down (being careful to avoid the ferret), and you will come to the Pier.
Leave the Pier by walking left until you come to the ladder.
Climb that, and continue left.
You can pretty much ignore the painting rabbit, so keep going until you come to the platform with the rope.
Stand on the edge and jump, opening your parasol (so as to avoid the ferret below).
Swim left and continue left until you reach the museum.
Go right and upstairs and continue on until you reach the Gryphon.
Scold him, and he’ll drop a cricket bat before he disappears.
Take that, and continue right until you reach the chessboard.
Stand to the right of the chessboard, and eat a cake (or mushroom).
Turn towards the chessboard and jump.
Walk up until you reach the middle black square in the third row.
Walk up a tiny bit further, drink an elixir, and go back down to the square and enter it.
This is the Mad Hatter’s place.
Offer the teacup, and he will give you his hat, which is one of the most important and useful items in the game (of course, the Hatter disappears after giving you the hat).
The part with the Queen of Hearts in the Court Room isn’t especially important.
However, if you go through it, make sure to argue with the Queen so she asks you the riddle, whose answer is “lap”.
There is nothing else of importance here, so you can go back through the chessboard and leave the museum.
On the way back, be careful.
When you are almost to the shore, use the hat to float above the ferret.
Continue on back to the Pier, and return up to the house (there is nothing else of great importance here, but you might find it amusing to chat with the Cheshire cat in the Carousel Room).
After leaving the Bathing Machine, you might want to try the next “door” down.
This is the door to Blenheim Palace. It’s not especially necessary, but if you go through it, remember to give all three teapots to the Queen.
Ok, now leave the house and go left until you come to Lacie the artist.
Give her the Memo, Muffin and Mushroom.
She’ll disappear, and you can continue on to the Treacle Well.
Climb down that and go right to the Cricket Ground.
Enter that, and keep going left to the School.
Go to the Music Room, and coax the turtle, who will sing a song for you.
Then go to the Dance Room and enter the mirror on the left, which will take you back to the house.
Now go up to the Duchess, stand on the block to the right of her, make yourself tall (with cake or mushroom), and use the hat.
You’ll float up and bang into the wall, but if you stand in the right spot, you’ll end up standing on the rope afterwards.
Eat a mushroom or elixir to get to normal size, then go up the rope and make your way to the cradle.
Examine the cradle.
There is an ugly baby inside, who will turn into a pig and walk off when you try to take it, but it leaves behind a rattle (which you have automatically; you don’t need to use the Take command).
Ok, now comes the tedious part.
You must make your way ALL THE WAY BACK to the rabbit hole you first came down (yeah, I know, but ya gotta!).
Use the hat to float up to the ledge to the left of the Cheshire Cat.
Then eat a cake and jump over to the Cat.
Stand on the right edge of the rock, face right, and use the whisker.
Shrink down to normal, and then walk along the whisker, and up to the door.
Inside is the Dormouse (don’t worry, you still have the whisker!).
Tease him, and he’ll sing you a song.
Now, leave and go all the way back to the tree with the rope hanging down.
Climb that, and make your way up to the bird’s nest. Sing “Shut Your Beaks” to them, then wait for 12 o’clock, when you can go through the mirror into Looking-Glass Land.


PART 3
Ok, so now you’re through the Looking Glass!
Take the door on the left, which leads to another room.
Take the center door, and try to help.
She’ll leave a brooch before vanishing.
Get that, and go through the mirror to Room Two.
Climb the rope there to Room One, and go out the window.
Jump (opening your trusty parasol), and you’ll be at the bottom of the Birdbath.
If you go left, you’ll find a garden and a Buttercup in it, but it’s not necessary to go there.
Walk right, passing the small Birdbath, and keep going until you come to the house with the rope.
Go up to Cloud Land, and use the hat to get to the door you see there.
Inside is the White Knight.
Help him, and he’ll sing you a song.
Teasing him also produces good results.
Leave, and make your way over to the other end of Cloud Land, where you’ll find the Bread and Butter Fly.
Take that, then go back down to earth.
Now go to the railroad station (it’s next to the house with the rope).
You’ll need a mushroom or elixir to get in.
Once inside, return to normal size, take the first door, and then walk right to the train.
Inside is a Unicorn.
Talk to him if you like, then go left to the Gnat.
Try calming him, and he’ll ask you a (very old) riddle.
The answer is “Duck”.
Then use the hat to float up out of the train.
When you fall back, you’ll be in a different train.
Walk right to the exit and leave.
Continue left, passing up the Waxworks (if you prefer, you can enter), until you reach the Jabberwocky.
Use the fan and he’ll disappear.
Keep going left until you come to the tree.
Stand on the left side, and use the hat to fly up.
You’ll find Humpty Dumpty up there, sitting in a nest.
Tease him, and he’ll leave a cravat for you.
Climb down, and walk left.
Here you need to be careful.
There is a ferret bouncing around the next screen.
As soon as you enter that screen, use the hat to float above him.
Do this as quickly as you can.
You’ll float up to the top of the steps (taking a fall in the process).
From there, go left to Tweedledum (or is it Tweedledee?).
Offer the rattle, and he’ll get out of your way.
Continue Left until you come to the White Queen again.
Give her the brooch, and keep going until you come to the door.
Go in, and try to calm the cranky machine.
It will sing you a song.
After that, leave, and go back right all the way until you come to the ladder going down (a note here about the Red Queen in the balloon.
If you decide to visit her, the answer to the riddle is “content”).
Climb down, go left (ignore the birdcage, it’s a trap) until you come to the sheep.
Sing “Munch, Munch, Munch”, and you’ll be able to get to the next room.
Offer the Bread and Butterfly to the Sgt Major, then climb up the ladder and go left.
Tease the baker, who will ask a riddle.
The answer is “Nightmare”.
Continue left and enter the Banquet Room.
Sing “God Save Queen Alice” to the Wasp, and you will be in the real Banquet Room with the talking Mutton.
Sing “No More Mutton” for it, and he’ll leave a paper crown (NOTE: you MUST have the crown before you visit the Bellman).
Ok, now go back the way you came, and return to the Palace.
Keep going left there, past the Easter Rabbit, until you reach the Barrister (British for “lawyer”).
Coax him, and he’ll ask a riddle.
The answer to that one is “Buttercups”.
Keep on left to the Bell Room. Stand directly under the rope, and use the cravat.
It will provide a way for you to climb up.
Continue to use the cravat to get up to the Belfry (note: always climb up on the right side).
If the Bellman isn’t there yet, just wait around (you can stand there, doing nothing, time will pass in the game regardless).
Offer the cricket bat to the Bellman, who will give you a key.
Take that, and go back down, and out to the ladder again, and make your way to the room that has the Banquet Room door.
This time, however, go up the stairs to the door above it and enter the Beryl Throne Room.
You can talk to the Throne or not, as you please.
Go through the door on the other side.
This leads you to a room with a ferret.
DO NOT go through the door on the bottom, it is a trap, you must go up via the rope.
You can pass the ferret by using the hat, it may take a few tries until you find exactly the right spot to stand, and the right timing as well.
Once past the ferret, get up the rope quickly, and make your way over to the White Rabbit.
Give him the fan, and he’ll get out of your way.
Now keep going.
You’ll come to another ferret, use the hat to get past him, as well.
You’re almost out now!
Go through the door at the top, and you’ll be in the Ballroom.
Go out the other door, and you’re in the Rabbit Hole.
Use the cravat (it may take you a few tries to find the best place).
Climb up the cravat, face right, and use the whisker.
Walk along the whisker as far as you can.
Then turn left and use the hat.

Leave a comment |

Alien Gate – Tips


Alien Gate

Level selection:
Level 05 -> CWOA
Level 10 -> ASJA
Level 15 -> VZOA
Level 20 -> SAKA
Level 25 -> TNNB


Leave a comment |

Atlantis – The Last Resort – Tips


Atlantis – The Last Resort

All unlimited
In the game main page, with the cursor, go to the upper – left side of the screen and press 1, 2, 2, 1 buttons sequence.
Screen will change automaticly…

You just have to activate:
– Unlimited ammunitions.
– Unlimited keys.
– Unlimited lives.
– Choose levels.


Reload guns and life:
(It will not work if you have already used the code above, obviously.)

During the game, if you finish ammunitions, lives, or if you don’t find any key…
Go to the map screen, with the cursor, go to the upper – left side of the screen and press 1, 2, 1, 2 buttons sequence.

Here is what will happen:
– All keys will appear.
– Life will be at maximum.
– Your ammunitions will be at maximum.

Attention! Your live will not be unlimited… neither ammunitions…!
You can do this code evry time you want!


Bonus stage
Level 05 -> CHIDUNI
Level 10 -> JFVTLDG
Level 12 -> JDUFDBZ
Level 17 -> YBNDIKG


Leave a comment |

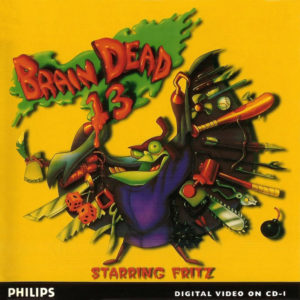
Brain Dead 13 – Tips


Brain Dead 13

Walkthrough from The CD-i Collective.
Great work from Gir Draxa.


Entryway and Intersection 1
Lance falls down the chimney into the fireplace followed by Fritz. Lance pulls a vase off Fritz’s head, and pokes him in the eyes. Lance runs to the left into Intersection 1. Press Left to go to Staircase 1, Right to go to Staircase 2, Up to go to the Main Gate. If you press Down, you’ll run into a dead end, and return to the Entryway to make your choice again..


Staircase 1
Lance walks on the brown stairs and pauses at a landing. Press Up to go to the Intersection 2, or Down to go to Intersection 1.


Staircase 2
Lance walks on the green stairs and pauses at a landing. Press Up to go to Intersection 1, or Down to go to Intersection 9.


Main Gate
Lance runs up to the closed gate. Press Down to run back to Intersection 1 before Fritz jumps on top of him.


Entry Room – From Intersection 1
Lance enters the room with the fireplace again. Quickly press Left to return to Intersection 1.


Intersection 2
Lance enters a hallway with paintings hanging on green and purple walls. Press Left to go to the Music Room, Right to go to the Bedroom, or Down to go to Staircase 1.


Music Room – From Intersection 2
The conductor marionette bounces around the room. Press Left as Lance enters the room to sidestep the conductors first strike. Press Right to sidestep the next one . Press Fire to jump back. Press Up to use one of the marionette’s strings to reach the balcony. Press Left to run out of the room before Fritz arrives and go to Intersection 3.


Intersection 3
Lance enters a hallway with a statue of a man holding a giant baseball on the left, an archway to the right, and a staircase to the rear. Press Left to cross a bridge to Intersection 4, Up to go to Moose’s Tower, or Right to go to the Music Room.


Intersection 4
Lance enters a hallway with a ladder on the left wall, an elevator winch to the rear, and a skull to the right. Press Left to go to the Blue Witch, or Right to go to Intersection 3. If Vivi, Moose, both Witches, and the Maze have been completed, an elevator will appear in the rear of this room.


Blue Witch (Left Eye’d)
Lance climbs up the ladder and comes face to face with a black cat. Press Up to avoid the cat’s claws. The cat scrambles away, as the blue witch turns away from her cookbook at the Lance’s interruption. The witch grabs her broomstick and flies towards Lance. Press Right to run into the next room.

Lance runs toward a shelf of skulls. Press Fire to duck underneath the shelf. Press Right to avoid the blue witch and run into the next room. Press Right to run into a room with the blue witch’s cat and a cauldron.

Press Right to avoid the cat’s claws and run out into an intersection.


Ending 1
Press Down to run into the blue witch’s kitchen. Lance will take an eyeball that is hanging over the cauldron. Press Right to run back into the intersection.

Press Up to run to the castle wall.

Press Fire to duck underneath the blue witch as she flies by. Press Up to duck underneath the blue witch again and run down the stairs to the edge of the wall. Press Right to jump on the gargoyle. Press Right to jump on the broomstick as the blue witch passes by. Press Fire to jump off the broomstick as it approaches the castle. The blue witch will crash into the castle wall, and Lance will be thrown into Intersection 5.


Ending 2
Press Up to run to the castle wall.

Press Fire to duck underneath the blue witch as she flies by. Press Up to duck underneath the blue witch again and run down the stairs to the edge of the wall. Press Right to jump on the gargoyle. Press Right to jump on the broomstick as the blue witch passes by. Press Fire to jump off the broomstick as it approaches the castle. The blue witch will crash into the castle wall, and Lance will be thrown into Intersection 5.


Intersection 5
Lance enters an area with curved walls with a long zigzag path to the rear and a light to the right. Press Left to enter the Cocoon Chamber, Right to go to Intersection 6, Up to go to Intersection 4, or Down to enter the Cocoon Chamber.


Cocoon Chamber – From Moving Left At Intersection 5
Lance will enter the room from the opening on the left side and pick up a fallen cocoon. Press Left, Right, Left to swing the cocoon at the liquid that drips down at Lance. Lance will leave the room through the opening on the right side and return to Intersection 5.


Cocoon Chamber – From Moving Down At Intersection 5
Lance will enter the room from the opening on the right side. Press Left, Right, Left, Left to avoid the liquid that drips down from the ceiling. Press Up to leave the room through the opening on the left side and return to Intersection 5.


Intersection 6
Lance stops in front of a door marked “Vivi’s”. Press Left to enter the Basement, Right to go to Intersection 5, or Up to enter Vivi’s Salon.


Basement – From Intersection 6
Lance enters the room from the door at the top of the stairs. Press Left to run on top of the barrel. Press B to jump on the spider. Press B to duck under the spider’s web. Press Up to leave the room through the door on the left and enter Intersection 9.


Vivi’s Salon
(please note : In version 1.0 of this title, if you chose to get a shave, the game will freeze up. Simply choose MANICURE then a FACIAL to get through it. You do not need to get a shave to complete the game.)

Lance trips into the salon and is greeted by Vivi. Vivi throws Lance into a chair as Fritz enters the salon. Vivi throws Fritz into a coffin. A spider drops down next to Lance. Press Fire to blow it away. Vivi pushes Lance in front of a mirror and eventually offers Lance a shave or a manicure. Press Left to select the shave. Press Right for a manicure.


Shave:
Press Fire when Vivi pulls out her sickle to duck underneath. Vivi steps away as one of the arms next to the mirror pulls out a knife. Press Right, Right to avoid the blade. Vivi returns and offers Lance a facial or a manicure. Press Right to select the manicure.


Manicure:
Vivi pushes Lance in front of another mirror and pulls out a cleaver. She holds Lance’s arm over a stump. Press the following moves in succession when Vivi’s fingers move: Up, Left, Up, Right, Left, Up, Left to stop her from chopping Lance’s hand off. Vivi will offer Lance a shave or a facial. Press Left to select a shave. Press Right to select the facial.

Vivi throws Lance into her beautifier as Fritz breaks out of the coffin.


Facial:
Ending 1 (must be done to get to see ending)
Press Fire after Vivi presses her remote control to avoid the spinning brushes. Fritz runs toward Lance, trips on a skull, and bounces Vivi into the beautifier. Press Fire to jump on the remote control that is sitting on top of Fritz. The beautifier will catch Vivi and overload. Press Left when Fritz jumps to his feet to escape up the stairs and return to Intersection 5.

Ending 2 (use if you return after using ending 1)
Press Left after Vivi presses her remote control to jump out of the chair and run up the stairs to Intersection 1.


Intersection 7
Lance enters a hallway with a skull on the left, an elevator winch to the rear, and a ladder on the left wall. Press Left to go to Intersection 5, or Right to go to the Red Witch. If Vivi, Moose, both Witches, and the Maze have been completed, an elevator will appear in the rear of this room. Press Up to enter it and go to Fritz’ Lair.


Red Witch (Right Eye’d)
Lance climbs up the ladder and comes face to face with a black cat. Press Up to avoid the cat’s claws. The cat scrambles away, as the blue witch turns away from her cookbook at the Lance’s interruption. The witch grabs her broomstick and flies towards Lance. Press Left to run into the next room.

Lance runs toward a shelf of skulls. Press Fire to duck underneath the shelf. Press Left to avoid the blue witch and run into the next room. Press Left to run into a room with the blue witch’s cat and a cauldron.

Press Left to avoid the cat’s claws and run out into an intersection.


Ending 1 (must be done to complete game)
Press Down to run into the blue witch’s kitchen. Lance will take an eyeball that is hanging over the cauldron. Press Left to run back into the intersection.

Press Up to run to the castle wall.

Press Fire to duck underneath the blue witch as she flies by. Press Up to duck underneath the blue witch again and run down the stairs to the edge of the wall. Press Left to jump on the gargoyle. Press Left to jump on the broomstick as the blue witch passes by. Press Fire to jump off the broomstick as it approaches the castle. The blue witch will crash into the castle wall, and Lance will be thrown into Intersection 3.


Ending 2 (use if you return after you complete ending 1)
Press Up to run to the castle wall.

Press Fire to duck underneath the blue witch as she flies by. Press Up to duck underneath the blue witch again and run down the stairs to the edge of the wall. Press Left to jump on the gargoyle. Press Left to jump on the broomstick as the blue witch passes by. Press Fire to jump off the broomstick as it approaches the castle. The blue witch will crash into the castle wall, and Lance will be thrown into Intersection 3.


Music Room – From Intersection 3
Fritz chases Lance on the balcony above the room. Press Right to jump on the organ. Press Left to jump down to the floor as Fritz leaps at Lance. Lance will run out into Intersection 2.


Bedroom – From Intersection 2
Lance enters the room from the door on the left side. Press Down to avoid the ghost that comes out of the broken mirror. Lance will take a pillow off the floor. Press Fire to swat a ghost with the pillow. Press Fire to hit another ghost. Press Fire to throw the pillow at the last ghost. Press Right to leave the room and enter the Library.


Library – From Bedroom
Lance enters the room and climbs down the ladder. Press Down to duck below the book that the librarian throws at Lance. Press Up to avoid another book and approach the door. Press Right to leave the room and go to Intersection 8.


Intersection 8
Lance enters a hallway with a statue holding a trident on the left and an open set of doors in the rear. Press Left to enter the Library, Right to enter the Trophy Room, or Up to enter the Maze.


Maze
Lance steps out on a balcony and looks at a maze of hedges with a large statue in the center. Press Right to jump off the balcony before Fritz arrives. To get through the maze and reach the Statue, press Right, Up, Left, Left, Left, Left, Down, Down, Right, Up, Up.


Statue
Lance enters a gate in the center of the maze and looks at a large statue. The tiles beneath Lance’s feet begin to tip. Press Left, Left, Left to avoid falling underneath the tiles.

Lance jumps on the fountain surrounding the statue. Press Fire to keep from falling into the fountain. Lance grabs one of the decorations surrounding the fountain. Press Right to avoid the toxic liquid that shoots out of the decoration. Press Fire to avoid another batch of liquid.

Lance runs to the other side of the decoration. Press Fire to jump on and swing around the post. Lance will knock the decoration off its base. Press Fire to grab the ledge around the base of the statue. Press Right to avoid the liquid that the statue spits at Lance.


Ending 1 (Must be done to complete game)
Press Right to climb up the base of the statue. Press Right to avoid the trident. Press Left to avoid the trident again. Press Right to avoid the trident one final time. Press Fire to jump on the trident.

The statue will lift Lance up into the air with its trident. Press Fire to drop onto the statue’s head. Press Fire to pull the wire from the statue’s forehead. Press Right to jump back on the trident. Press Fire, Fire and Lance will be thrown from the trident and land back on the balcony at Intersection 8.


Ending 2
Press Up to jump in the hole at the base of the statue. Lance will emerge from the fountain at Intersection 1.


Library – From Intersection 8
Lance enters the room from the door to the right. Press Down to run down the stairs and avoid the bookworm. Press Left to run to the center of the room. Press Fire to duck underneath the bookworm. Press Fire to avoid another bookworm. Press Up to climb up the ladder. Press Up to leave the Library and enter the Bedroom.


Bedroom – From Library
Lance enters the bedroom from the door to the right. Press Down to avoid the ghost that is hiding in the bed. Press Left to avoid it again. Press Up to run out the door on the left and enter Intersection 2.


Moose’s Tower
Lance is chased up the tower steps by Fritz. Press Right at the end of the stairs to swing around to the doorway.

Press Fire when Lance shuts the door to avoid Moose’s football. Press Up to avoid another pass. Press Right to avoid Moose’s tackle. Press Right to run to the next part of the room.

Lance will run towards a basketball hoop. Press Left to keep from being crushed when Moose swings his bat. Press Right to avoid another swing. Press Up to climb up the pole. Press Fire when Moose pulls the hoop towards the floor to jump on his back. Press Right to ride on top of Moose to the next part of the room. (Note: The rest of the scene may be reversed, with Left and Right moves switched.)

Lance covers Moose’s eyes as he wanders down a hallway filled with electrically charged poles as Fritz enters the room. To avoid being electrocuted, press Down, Up, Up, Down, Down, Left, Right, Up. Lance will grab an overhead bar as Moose knocks himself out. Fritz pulls a rope, raising Lance and Moose on an elevated platform to the highest part of the tower. Lightning strikes the top of the tower as Lance and Moose reach the top. Press Left to jump off the platform as Moose sits up.


Ending 1 (must be done to complete game)
Press Right to run to the other side of the tower. Press Up to climb the ladder. Lance looks at the controls of the tower’s lightning rod. He pushes the lever all the way to the right, breaking it off. Moose climbs up the ladder and reaches the lightning rod. Press Left to throw the control lever and jump to the edge of the tower’s roof. Two bolts of lightning will strike Moose and send the pieces falling below, onto Fritz.

Lance slides onto a gargoyle from the tower roof. Fritz appears at a window above Lance. Press Right to jump directly below Fritz. Press Right before Fritz can swing off the window. Lance will run back into Intersection 3.


Ending 2
Press Left to jump off the top of the tower Lance will slide onto a gargoyle before dropping down into Intersection 1.


Intersection 9
Lance enters a hallway with jars on a shelf to the left and sacks and barrels to the right. Press Left to enter the Kitchen, Right to enter the Basement, or Down to go to Staircase 2.


Kitchen – From Intersection 9
Lance enters and interrupts the alligator that is cooking. Press Left when the cook pulls out the butcher knife to jump over the table. Press Fire when Lance reaches the floor to duck under the knife. Press Right after the cook swings the knife again to run next to the stove. Press Fire, Up to jump over the knife and run out of the kitchen and into the Trophy Room.


Basement – From Intersection 9
Lance enters the room from the door on the left. A giant centipede appears from the drain. Press Fire to jump over the centipede and run up the stairs. Press Fire to open the door and enter Intersection 6.


Trophy Room – From Kitchen
Lance runs down a short hall and enters the room. Press Fire to avoid the killer rug. Lance will enter Intersection 8.


Trophy Room – From Intersection 8
Lance enters the room from the door on the left side. Press Down to avoid the bat. Press Left to avoid the serpent, then press Right to slip away from the ape. Lance will exit through the door on the right and enter the Kitchen.


Kitchen – From Trophy Room
Lance runs down a short hall and climbs back into the kitchen. Press Right to avoid the flame from the stove. Lance exits the room and goes to Intersection 9.


Fritz’s Stairway
Lance walks up to a long series of stairways, with Fritz at the top. Lance flips up the carpet, sending it up to knock Fritz down the stairs. As Fritz rolls by Lance, a sword falls at his feet.


Ending 1
Press Fire to take the sword. Press Left to run away before Fritz arrives. Fritz switches on a chain saw and follows Lance. Press Fire to jump over Fritz, Fire to swing at Fritz, Fire to jump over Fritz again, and Left to run up the stairs.

Lance stops at a landing and picks up a club before continuing up the next staircase. Fritz pulls out a pickaxe and follows Lance. Press Fire to swing at Fritz, Right to avoid his counter-attack, Left to jump on Fritz, and Right to continue running up the stairs.

Lance stops at a landing and picks up a mallet before continuing up the next staircase. Fritz pulls out a machete and follows Lance. Press Left to avoid Fritz’s swing and Fire to break the mallet over his head.

Lance runs up to the next landing and picks up a hockey stick before continuing up the next staircase. Fritz pulls out an axe and follows Lance. Press Right to avoid Fritz’s attack, Fire to swing at Fritz, Left to jump over Fritz, Fire to club him over the head, and Right to continue running up the stairs.

Lance runs up to the next landing and picks up an axe before continue up the next staircase. Fritz pulls out a hammer and follows Lance. Press Fire to take a swing at Fritz, Left to avoid his counter-attack, Right to jump on top of Fritz, and Left to continue running up the stairs.

Lance runs up to the next landing and picks up a hammer before continuing up the next staircase. Fritz pulls out a razor and follows Lance. Press Right to avoid Fritz’s attack and Fire to break the hammer over his head. Lance will run up the last section of stairs and enter the door to Dr. Neurosis.


Ending 2
Press Left to run up the stairs before Fritz arrives.
Lance stops at a landing and picks up a club before continuing up the next staircase. Fritz pulls out a pickaxe and follows Lance. Press Fire to swing at Fritz, Right to avoid his counter-attack, Left to jump on Fritz, and Right to continue running up the stairs.

Lance stops at a landing and picks up a mallet before continuing up the next staircase. Fritz pulls out a machete and follows Lance. Press Left to avoid Fritz’s swing and Fire to break the mallet over his head.

Lance runs up to the next landing and picks up a hockey stick before continuing up the next staircase. Fritz pulls out an axe and follows Lance. Press Right to avoid Fritz’s attack, Fire to swing at Fritz, Left to jump over Fritz, Fire to club him over the head, and Right to continue running up the stairs.

Lance runs up to the next landing and picks up an axe before continue up the next staircase. Fritz pulls out a hammer and follows Lance. Press Fire to take a swing at Fritz, Left to avoid his counter-attack, Right to jump on top of Fritz, and Left to continue running up the stairs.

Lance runs up to the next landing and picks up a hammer before continuing up the next staircase. Fritz pulls out a razor and follows Lance. Press Right to avoid Fritz’s attack and Fire to break the hammer over his head. Lance will run up the last section of stairs and enter the door to Dr. Neurosis.


Dr. Neurosis
Lance enters a long hallway and walks towards Dr. Neurosis. Suddenly, Fritz appears behind Lance and pulls out all of his remaining weapons. Press Left to step to the other side of the hallway.


Ending 1
Press Left, Left, Left, Down, Up, Left to stay in front of Fritz’s bullets.

Lance will end up back where he began running. Press Left to step to the other side of the hallway. Press Right to jump in front of Dr. Neurosis and taunt Fritz.

Press Right, Down, Left to avoid Fritz’s bullets. Dr. Neurosis will yell at Fritz. Press Right, Down, Fire, Right, Up to avoid Fritz’s bullets. Dr. Neurosis will yell at Fritz again. Press Down, Fire, Down. Dr. Neurosis will yell at Fritz again. Press Fire to avoid Fritz’s bullets. The eyeballs from the witches will fall to the floor. Press Fire to pick them up and Fire to throw them at Fritz. Fritz will fly into Dr. Neurosis’ chamber. Lance will flush Fritz and Dr. Neurosis away and start a chain reaction that will destroy the castle. Press Up to escape and complete the game.


Ending 2
Press Right to jump in front of Dr. Neurosis and taunt Fritz.

Press Right, Down, Left to avoid Fritz’s bullets. Dr. Neurosis will yell at Fritz. Press Right, Down, Fire, Right, Up to avoid Fritz’s bullets. Dr. Neurosis will yell at Fritz again. Press Down, Fire, Down. Dr. Neurosis will yell at Fritz again. Press Fire to avoid Fritz’s bullets. The eyeballs from the witches will fall to the floor. Press Fire to pick them up and Fire to throw them at Fritz. Fritz will fly into Dr. Neurosis’ chamber. Lance will flush Fritz and Dr. Neurosis away and start a chain reaction that will destroy the castle. Press Up to escape and complete the game.


Leave a comment |

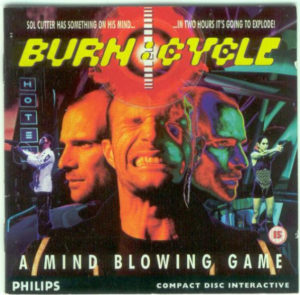
Burn Cycle – Tips


Burn Cycle

Watch all videos of the game:
During the game, select the “virus” icon in the inventory to show the save screen.
Select “save”, and insert this name as save game: “JOHN_WHO”.


Choose a level:
During the game, select the “virus” icon in the inventory to show the save screen.
Select “save”, and insert the livel name code of your choice:

Hart Maze End (before Kris kill):
CH_HART_END

In front of the Karmic Church’s hut:
CH_KARM

Out of hotel:
CH_HTEL_EXT

Cutter’s hotel’s room:
CH_HTEL_INT

Doctor’ door:
CH_LOKB


Leave a comment |

Christmas Country – Tips


Christmas Country

Level selection:
Reach the end of the first stage, but don’t enter the castle. Instead, hop over the door and advance to the right. You’ll find a wall. Spin against it and aim for the third block from the base of the wall, partially breaking it in the process. Hop into the gap and continue right to pass through that opening and reach a small room. There, a menu will appear that lets you choose to continue play in any of the game’s other stages.


Leave a comment |

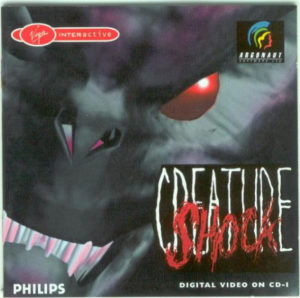
Creature Shock – Tips


Creature Shock

Level selection:
In the main menu:
Hold button 2;
Move the cursor to the top left side and press 1;
Move the cursor to the top right side and press 1;
Move the cursor to the bottom left side and press 1;
Using the Creature Shock letter’s name, “write” CHEAT by pressing button 1 on each letter. Use the 1st E of “Creature”.

A new screen will appear with several options:
Sound ON/OFF
Level select
Credits


Walkthrough from The CD-i Collective.
Great work from Gir Draxa.

Mission To Saturn
The asteroids cannot be destroyed.

Shoot the targets which fire at your ship and ignore the passive objects. If a target gets
too close, avoid it and allow it to fly past.

The only vulnerable areas on the final target are the two light ovals that fire at your ship.
Target those areas while avoiding all other objects and incoming fire. Destroy the final target
to complete the mission.


Aboard The Alien Ship
Random aliens that will be encountered include a flat “centipede” on the floor and walls
(vulnerable spot: head) and a flying “bat” (vulnerable spot: body).
Shoot all the aliens that crawl out of the trenches.

Your character will face three circular openings. Rotate to the right and enter the opening
to the far right.

Move forward and kill the tusked biped alien armed with a gun. Its vulnerable spot is
the yellow sphere on its chest.

Move through the circular door. Move forward and follow the tunnel as it curves to
the left. Stop and rotate to the left after the curve. Examine the door in the
circular protrusion in the wall to open it. Select the red sphere to boost the
gun’s energy capacity.

Rotate to the right and continue to follow the tunnel until an intersection is reached.
Follow the fork to the right.

Move forward along the tunnel to reach the next intersection. Follow the fork to the
right. Kill the large “spider” on the wall. Its vulnerable spot is the green sphere
on its underbelly.

Move forward along the tunnel to reach the next intersection. Follow the fork to the right.

Move forward along the tunnel and enter the circular door. Enter the chamber. Target the
jumping “spiders” in the center of the screen first, and then the flying “wasps”. Shift
back to the center of the screen as more jumping “spiders” appear.

Move forward to the circular opening on the far wall. Your character will slip into
the opening and slide downward. Keep the cursor on the left part of the screen and quickly
press the appropriate button when the chute splits to follow the left path.

Your character will tumble into another section of tunnels. Move forward along the tunnel
and enter the circular door. The path moves over a bridge that splits in the center of
a large chamber. Follow the fork to the right.

A large blue “larvae” will drop down over your character. Use a smart bomb when the creature
shoots an energy beam from its tail. The creature will fall in front of your character.
Use the shield to defend against the creature’s bite attack. Fire another smart bomb
to kill the creature when it attacks with its tail again. Enter the circular door that
the creature was blocking.

Move forward along the tunnel to reach the next intersection.
Follow the fork to the left.

Move forward along the tunnel to reach the next intersection.
Follow the fork to the right and enter the circular door.

Move forward into the center of the large chamber. Captain Sumoki will enter the
chamber through one of the other circular doors and morph into a large horned creature.
Fire the last smart bomb when the creature’s eyes are visible. Use the shield to defend
your character against the creature’s attacks. Fire the gun at the creature’s eyes when
they are visible until it is defeated to complete the mission.


Mission To Tethys
Follow the blue alien probe as it flies over the surface of the moon. There are many forks
in the path that must be followed. Note that quick sharp turns must be executed on a few
of the forks.
Always follow the blue probe and ignore the red decoy probe that appears from time to time.

At certain points, large blast doors that close off the entire width of the path will
appear. Shoot at the doors
to open them. Fly through the opening and continue to follow the probe.

Avoid the falling stalactites in the underground sequences.

Many of the alien targets can be ignored. Concentrate on following the probe and
avoiding the walls.

Hitting a bridge pylon with the ship will not result in damage. Instead, the ship will be
delayed until it is moved over an open area.


Inside The Dome
Random aliens that will be encountered include a flying spiked sphere (vulnerable spot: center),
a saucer emitting a blue beam (vulnerable spot: moving blue area in center), and a giant
“worm” in the tunnels (vulnerable spot: center of its mouth).
Shoot the spinning aliens. Enter the middle triangular door.

Move forward and enter the triangular door. Your character will enter a silver section of
hallway. A creature resembling a large tentacled “eye” will drop from the ceiling. Quickly
shoot the creature’s eye when it opens to destroy it. Your character will be killed
if the creature is allowed to approach too closely.

Enter the triangular door that the creature was blocking and move forward. Follow the
hall as it turns red and curves to the left.

Continue to follow the hall until a round protrusion on the left wall appears. Rotate to
the left and examine the door in the protrusion in the wall to open it. A red sphere will
restore your character’s body armor to full strength. Rotate to the right and continue to
follow the hall.

Follow the hall as it turns red and curves to the right. The hall will end in a “T”
intersection. Follow that hall that branches to the left.

Enter the triangular door to enter a chamber that contains a machine in the center.
Kill the “eye” creature that will appear from behind the machine. Enter the triangular
door on the right side of the chamber.

Follow the hall and watch the metal walkway as your character moves forward. Your character
will enter a section of hallway where the metal walkway branches to the left. (If your
character reaches a chamber with three circular and triangular exits, the walkway branch
was missed.) Stand at the branch and rotate to the left. Move forward along the new hallway.

Follow the hall as it turns red and curves to the right. Enter the triangular door.

Your character will face a group of ovoid creatures that move along pipe-like tracks. Use
the shields and wait until a creature pauses to fire. Shoot and destroy the creature while
it is motionless.

After all the creatures are destroyed, rotate to the right. Your character will be facing
three doors. Move forward and rotate to the left. In this position, the pipe-like
tracks will be on the left and the round door will be to the right. Enter the triangular
door directly in front of your character.

Move forward and follow the hallway as it turns red and curves to the right. Follow the hall
and watch the metal walkway as your character moves forward. Your character will enter a
section of hallway where the metal walkway branches to the left. (If your character reaches a
small chamber with a circular section of floor, the walkway branch was missed.) Stand at
the branch and rotate to the left. Move forward along the new hallway.

Follow the hall as it turns red and curves to the right. Enter the triangular door to enter
a small room. Rotate to the left and examine the door in the protrusion in the wall to
open it. A red sphere will restore your character’s body armor to full strength. Rotate to
face the triangular door and enter.

Return to the point where the metal walkway branched. Follow the branch that leads to the left.

Move forward along the hall and enter the triangular door.

Your character will enter a small chamber and stand on a circular section of floor.
Move the pointer to the top of the screen and move upward. The floor section will rise.

Enter the triangular door directly in front of your character. Move forward along the hall.
Follow the hall as it turns red and curves to the right.

Enter the triangular doorway to enter a large chamber. The chamber contains a semi-circular
path and a bridge that leads to a central circular door. (The central circular door leads
back to the last red sphere that was obtained.) A large “spider” creature will attack. Rotate
with the creature if it moves off-screen. Use a smart bomb when the creature’s red eye is
visible to knock the creature off the ledge. The “spider” will re-appear as your character
walks towards the central circular door. Use another smart bomb to destroy the creature.
Enter the triangular door on the other side of the chamber.

Follow the hall as it turns red and curves to the right. Follow the hall and watch the metal
walkway as your character moves forward. Your character will enter a section of hallway
where the metal walkway branches to the right. (If your character reaches a small
chamber with a circular section of floor, the walkway branch was missed.) Stand at the branch
and rotate to the right. Move forward along the new hallway.

Follow the hall as it turns red and curves to the left. Continue to move forward until your
character encounters a large walking gun. Shoot the area (or use the last smart bomb) on the
right side of the gun turret next to the creature’s “neck” to destroy its gun turret.
Shoot the red sphere on its right “shoulder” to destroy that appendage. Shoot the red
sphere underneath its forward leg as it attacks to destroy the creature.

Move forward along the hall and enter the triangular door. Your character will enter the
generator chamber. Shoot several times at the bottom of the structure hanging from the
ceiling to destroy the transmitter. The walkway will collapse. Enter the triangular door
at the top of the walkway. The display in the lower right corner will show the amount of
time remaining before the complex explodes.

Retrace the path used to enter the complex to return to the ship and complete the mission.


The Alien Mothership
Move forward, rotate right, and enter the door. Move forward and follow the hall as it turns to
the right. Continue following the hall and watch the sides as your character moves forward
to look for an intersection. Rotate left and move forward at the intersection.
Follow the hall as it turns to the left. Use the door at the end of the hall to enter a large
chamber. Move to the opposite end of the chamber.

A large alien will rise from the floor. Shoot the red row on the creature’s helmet. After the
creature’s head-piece is destroyed, the alien will re-appear behind your character and
throw him through the wall.

Your character will jump on a conveyor belt, followed by the large alien. Shoot the
creature’s eyes until it falls. Do not allow the creature to approach too closely.

Your character will jump off the conveyor belt and run down a hall to a doorway. Shoot the
large alien as it approaches. Watch the crosshairs and fire when it is highlighted with
triangles. The creature will be too far away to aim at a specific location.

The doors will close before the large alien can attack your character. A trap door will open
and drop your character into another chamber. The creature will arm itself with a jetpack and
gun and re-appear in the chamber.

As the creature flies over the central platform in the chamber, shoot the red rectangle that
appears in the front of the jetpack. Fire the smart bombs when the red rectangle is visible.

During the final battle, do not allow the creature to get behind your character. If necessary,
move the cross-hairs to the bottom of the screen and press the appropriate button to move back.
The creature will move behind pillars to the left and right of the chamber. After backing up
to this new location, turn left or right as necessary to face the creature directly. The
creature’s pattern is to shoot the gun, fire an energy ball, shoot the gun, and punch.
Timed correctly, there are at least two times during they cycling of this pattern that
it will be vulnerable. The ending animation will begin after the creature is killed.


Leave a comment |

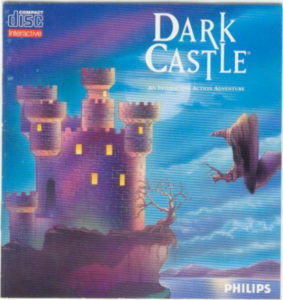
Dark Castle® – Tips


Dark Castle®

Room selection:
Enter the following button combination in the Great Hall, at the start of the game:
DOWN, DOWN, DOWN, UP, UP, UP, DOWN, DOWN.

Numbers will appear at the bottom of the screen, modify them to select the room you want to access.
0-2 Trouble levels
3-6 Fireball levels
7-10 Shield levels
11-13 Black Knight levels


Leave a comment |

Defender of the Crown – Tips


Defender of the Crown

Win the 1st castle battle:
If you start a game in the lower castel, move all your men in your army and take 3 high men who was in the lower land.
Like this, you’ll have a strong army with a lot of men.
Return to your castel, there you’ll be able to buy more men.
When arrow show battel, do:
front, rear, attack, and repeat.
You ‘ll defeat your adversary without any problems.
Move your lance before she approach to the adversary shield, after, move it just a little to the bottom.
Count the rebound, and in the 5th attack, take aim to the lower as possible.


Leave a comment |

Family Games 2 – Tips


Family Games 2

Tips from The CD-i Collective.
Great work from Gir Draxa.

Hidden fake DOS Emulator
Put your pointer on the menu to the LEFT of the hamburger. It won’t turn light blue, but click that area anyway. It will begin to run a fake system test as if it were booting on a PC.


Leave a comment |
Next Page »

CD-i titles

  • [01] Games (144)
  • [02] Kids (82)
  • [03] Multimedia (275)
  • [04] School 2000 (8)
  • [05] Homebrew (7)
  • [06] Music (31)
  • [07] Karaoke (197)
  • [08] CD+Graphics (24)
  • [09] Photo-CD (41)
  • [10] Digital Video on CD-i Movies (21)
  • [11] Digital Video on CD-i Music (14)
  • [12] Video-CD Movies (127)
  • [13] Video-CD Music (17)
  • [14] Video-CD Others (39)
  • [15] Video-CD Sampler / Demo (6)
  • [16] Web-i / CD-Online (5)
  • [17] Internal Use (1)
  • [18] Professional (98)
  • [19] Promotional (16)
  • [20] Demonstration Only (52)
  • [21] Free Demo Discs (19)
  • [22] Tutorial discs (2)
  • [23] Testing Discs (86)
  • [24] Unreleased (46)

More…

  • Catalogue #6900000-0 (USA) (223)
  • Catalogue #69900000-0 (Europe from USA) (24)
  • Catalogue #8100000 (Europe) (156)
  • Catalogue #8110000 (United Kingdom) (101)
  • Catalogue #8120000 (France) (179)
  • Catalogue #8130000 (Germany) (123)
  • Catalogue #8140000 (Netherlands) (200)
  • Catalogue #8150000 (Italy) (57)
  • Catalogue #8160000 (Iberica) (44)
  • Catalogue #8170000 (Scandinavia) (8)
  • Catalogue #8180000 (Belgium) (29)
  • Catalogue #8190000 (Worldwide) (46)
  • Catalogue #PCIM/X-00000 (Japan) (27)
  • Catalogue PC/MAC (17)
  • CD-i Bridge (21)
  • CD-i Ready (40)
  • Exclusive Regional titles (398)
  • Interviews (3)
  • Reviews (24)
  • Tips & Tricks (23)
  • USA Release (43)

Search titles

Guess the picture!

Guess pic!

Recent forum topics

by omegalfa 1st Basque Country CD-i Philips Tournament 2023 Last Saturd … Read More2 weeks ago
High Scores competition - Tetris®by omegalfaLike I said a few weeks ago, a competition with your High Scores i … Read More3 weeks ago
Hight Scores competition - Tetris …by omegalfaLike I said a few weeks ago, a competition with your High Scores i … Read More3 weeks ago
1st Basque Country CD-i Tournamen …by omegalfa A few weeks ago I have been contacted by Egoitz Gonzalez, a Span … Read More1 month ago

CyberChimps WordPress Themes

© The world of CD-i [Please add credits to us when using any content from this site]